
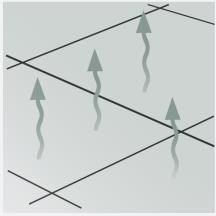
When laying terracotta tiles always prepare to part or fully seal the tiles before grouting. This is because the unsealed terracotta is very porous and any grout that is allowed to enter the surface of the unsealed tile will be extremely hard to remove and will no doubt stain as it dries.
In the article below we have links to the recommended products you will need, the links go to Amazon listings from which we make affiliate commissions at no extra cost to you. The products are tried and tested and are also available from our main site. The Amazon links will take you to suppliers with free delivery.
TERRACOTTA – Preparation
APPLICATION BY HAND
Hand or machine made low fired clay tiles.
The following is a traditional cleaning and sealing guide for terracotta floor tiles. The products and methods specified should ensure that surfaces are suitably conditioned before sealing. Future cleaning and aftercare then made easier following the application of a natural oil based sealer and finishing with a natural wax to protect the surface.
Step One: CONDITIONING & CLEANING THE SURFACE (before sealing & grouting)
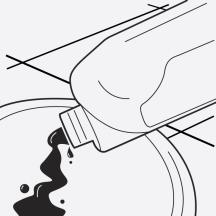
LTP GRIMEX: Cleans and removes grease, dirt & grime. 1Ltr or 5Ltr options

1.  2.
2.  3.
3.  4.
4.  5.
5. 
![]()
![]()
![]()
![]()
STEP 1.
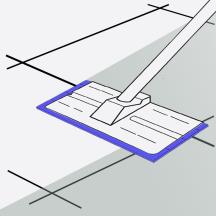
Dilute solution 1:10 with warm water and apply to the surface.
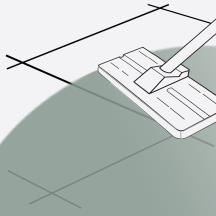
STEP 2.
Working in manageable areas at a time, spread out the solution. Leave for 15 minutes.
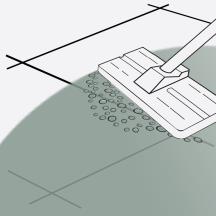
STEP 3.
Agitate the surface to remove any dust and grime.
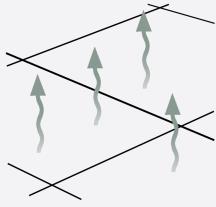
STEP 4.
Sponge up released residues. Rinse with water a second time and sponge
again.
STEP 5. Allow surfaces to dry before allowing traffic or sealing.
Types Of Sealing before grouting
You have 2 main ways to seal your terracotta tiles, the Traditional method or the Synthetic method
- First, the Traditional method of Boiled Linseed Oil. This option will darken the tiles.
TERRACOTTA – TRADITIONAL METHOD
APPLICATION BY HAND
Hand or machine made low fired clay tiles
The following is a traditional sealing guide for terracotta floor tiles. The products and methods specified above should ensure that surfaces are suitably conditioned before sealing. Future cleaning and aftercare then made easier following the application of a natural oil based sealer and finishing with a natural wax to protect the surface.
PROTECT AGAINST STAINS – (apply before grouting)
LTP BOILED LINSEED OIL – Traditional oil based impregnating sealer.
 LTP BOILED LINSEED OIL
1.  2.
2.  3.
3.  4.
4.  5.
5. 
![]()
![]()
![]()
![]()
![]()
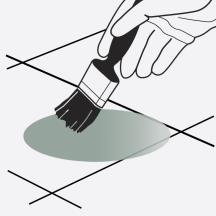
STEP 1.
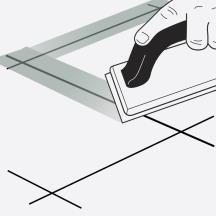
Apply sealer to the surface of the terracotta & spread out evenly using a brush
STEP 2.
Allow sealer to absorb naturally.
Underfloor heating must be off.
STEP 3.
Apply further coats at 4 hour intervals until the terracotta is fully saturated.
STEP 4.
1 hour after applying the final coat of oil, dry buff the surface using an absorbent towel to remove any excess.
STEP 5.
Newly sealed surfaces should be left to dry for a minimum of 12 hours before allowing heavy traffic or waxing.
The Traditional method of Boiled Linseed Oil finished with a natural Wax finish
TERRACOTTA – TRADITIONAL SEALING METHOD
APPLICATION BY HAND
Hand or machine made low fired clay tiles.
The following is a traditional cleaning and sealing guide for terracotta floor tiles. The products and methods specified should ensure that surfaces are suitably conditioned before sealing. Future cleaning and aftercare then made easier following the application of a natural oil based sealer and finishing with a natural wax to protect the surface.
PROTECT THE SURFACE AFTER SEALING – (apply before and after grouting)
LTP CLEAR WAX or LTP ANTIQUE WAX – Will help protect against water, oil, grease, dirt, grime and aid maintenance.
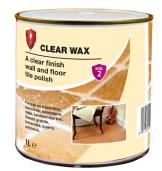 LTP CLEAR

1.  2.
2.  3.
3.  4.
4.  5.
5. 
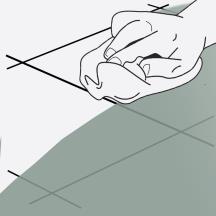
STEP 1.
Apply generously and work into the surface with a cloth.
STEP 2.
Leave the wax for 20 minutes and then buff to a shine using a stiff scrubbing brush.
STEP 3.
Leave wax to cure for 1 hour and then grout the joints.
STEP 4.
Once residual grout has been removed with LTP Grout Stain Remover, after 12 hours apply a further coat of wax covering the joints as well.
STEP 5.
Leave the wax for 20 minutes and then buff to a shine with a stiff brush. Allow light traffic for the first 12 hours and do not wash surfaces for 3 days
synthetic Sealing Method
TERRACOTTA – SYNTHETIC METHOD
APPLICATION BY HAND
Hand or machine made low fired clay tiles.
The following is a synthetic cleaning and sealing guide for terracotta floor tiles. The products and methods specified should ensure that surfaces are suitably conditioned before sealing. Future cleaning and aftercare then made easier following the application of an impregnating sealer and finishing with a film forming liquid wax to protect the surface.
Condition and Clean the surface with Grimex as mentioned above
PROTECT AGAINST STAINS – (apply before grouting)
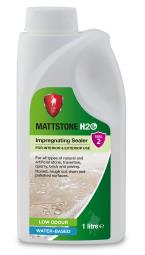
LTP MATTSTONE H20 – Helps prevent staining from cement and grout residues.
 LTP COLOUR INTENSIFIER – Colour Enhanced Finished
1.  2.
2.  3.
3.  4.
4.  5.
5. 
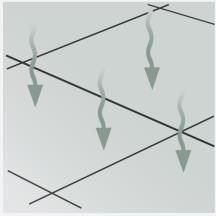
STEP 1.
Apply LTP Mattstone H20 (will keep the terracotta as unsealed colour) or LTP Colour Intensifier until fully saturated. (will intensify or lift the colour variation)
STEP 2.
Allow sealer to absorb naturally. Repeat at two hourly intervals until the terracotta is fully saturated.
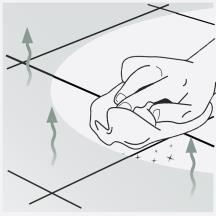
STEP 3.
45 minutes after applying the final coat of sealer, dry buff the surface using a microfibre cloth to remove any excess.
STEP 4.
Leave to dry naturally.
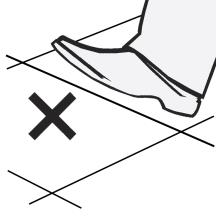
STEP 5.
Newly sealed surfaces should be left to dry for a minimum of 12 hours before allowing heavy traffic.
PROTECT THE SURFACE AFTER SEALING – (apply before and after grouting)
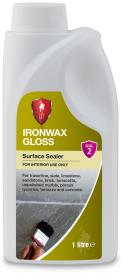 LTP IRONWAX GLOSS – Help protect against water, oil, grease, dirt grime and aid maintenance.
 LTP IRONWAX SATIN – Help protect against water, oil, grease, dirt grime and aid maintenance.
LTP IRONWAX GLOSS or LTP IRONWAX SATIN
1.  2.
2.  3.
3.  4.
4.  5.
5. 
STEP 1.
Apply sealer to the surface and spread out evenly. Two coats should be applied at hourly intervals.
STEP 2.
Leave to dry naturally. Do not rub or buff the surface.
STEP 3.
Leave to cure for 4 hours and then grout in the joints.
STEP 4.
Once residual grout has been removed with LTP Grout Stain Remover, after 12 hours, apply a further coat of Ironwax covering the joints as well.
STEP 5.
Newly sealed and finished surfaces should be left to dry for a minimum of 12 hours before allowing heavy traffic. Do not wash for 3 days.


great article, thanks